What Would Jamie Wear: New Year's Eve on the Town

2011 is almost here if you can believe that, I sure can't but ready or not, here it comes!  So with the fast approaching new year the question(s) of the moment will be  where are you going to be when the ball drops and depending on the answer to that question your next thought is most likely, "What am I going to wear"! 

While I do miss dressing up for New Year's Eve and hitting the town, Kelly and I have joined our friends in a new tradition, a sweatpants party!  I know for younger folks this may seem a little lame but it really does not get any better than dressing down to go to a party where everyone drinks champagne, plays board games, and waits for the ball to drop in complete comfort.  I probably do not have to show you how to wear comfy clothes but this week for all of you going out for the holiday or going to a house party where sweatpants are not invited I will show you a few items that you can use to make any outfit a bit more festive. 

Forever21 Beaded Front Chiffon Top:  This would be great with a pair of skinnies (my favorite) or to make it a little more formal you could tuck it into a skirt, slightly bloused out with a trendy belt.  This would be great with black stockings and a pair of black velvet pumps! 


J Crew Couplet Dress: This one is a classic and can be worn for many other occassions besides New Year's Eve 
Couplet dress


Topshop Waterfall Ruffle Assymetric Dress: LOVE , this dress and it would be beautiful alone with black heels or with black stockings and a sexy pair of pumps. 


Topshop Embelished V Back Blouse:  This top has just enough bling to ring in the new year and would look amazing with a pair of dark jeans tucked inside your boots or with long boot cut jeans over a pair of tall pumps.  


Stella & Dot: This is a night to really glam it up, so here are some gorgeous accessories that you could wear with a simple black top and dark jeans or black skinny jeans/pants.  In this case the accessories are really the star of the show and the simple wardrobe choice can be the stage to set it off. 


I hope you all have fun shopping for your night out and if you need help or have questions, send them our way. 


See you swoon, 

Merry Christmas!

Merry Christmas!  Jamie and I want to wish you and yours the merriest of Christmases and a happy, healthy 2011.  We can't thank you enough for taking a moment from your busy day to read our blog.


Enjoy time with your loved ones today and always. Cheers!

See you swoon,


{photo courtesy of Martha Stewart}


Swoon-Worthy Sites: Houzz.com

I just recently learned about this Houzz.com and I have been completely addicted ever since.  This website has an endless amount of ideas that you can use to inspire your home design from paint colors, to linens, furniture right down to the tiny details such as hardware on cabinets, flowers or window treatments and so much more.

I know I just finished my bedroom but I have now found a new bedroom that I would like to try out.  This is actually more of the color I was going for but my golden straw color turned out to be a little more yellow than I would have liked.  I do not plan to continuously change all of my rooms around on a monthly basis but this room I think I must have at least some elements of it.


LA bedroom modern bedroom


What I absolutely love about this site is that you can create your own ideabooks and save pictures that you find yourself swooning over as well as make notes about what specific things you actually saved the picture for in the first place.  I have only been on this site for a week and could design about 25 homes at this point!


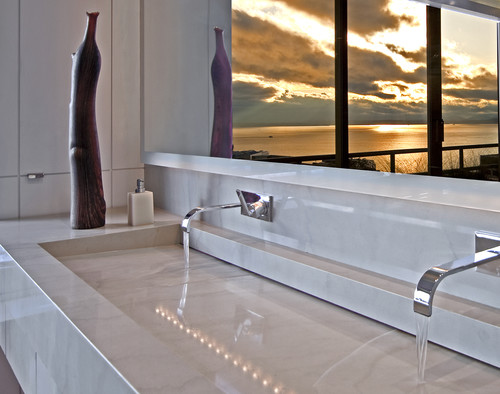
Next up, bathrooms!  Now since I have this view out of my bathroom I will be doing this...
Master Bathroom contemporary bathroom


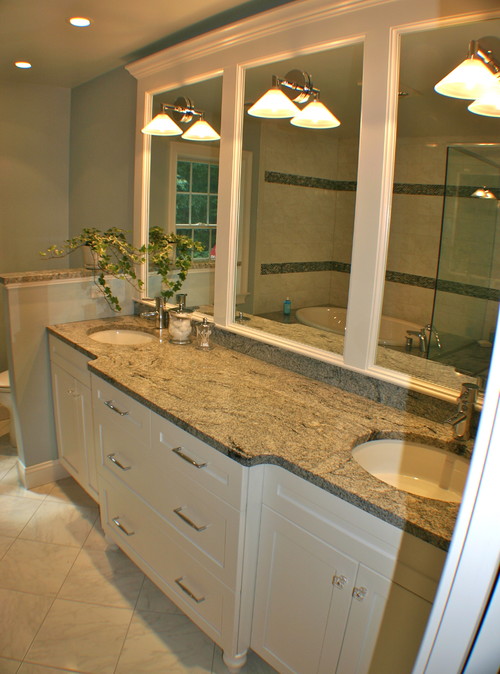
Just kidding, I wish!  Seriously though I love this design below, so simple and just enough color to keep the look clean:
Oasis modern bathroom


So go check this site out and start your own ideabook, and as always, we would love to see what you find!


See you swoon,

DIY Tutorial: Tearing Out Shower Doors

I feel a little like Milli Vanilli.  Remember in the early 90s when they got busted for lip syncing because their CD got stuck on endless repeat "girl you know it's ... girl you know it's ... girl you know it's ... "? Yeah, well for the past few weeks, I've been saying "tear out shower doors ... tear out shower doors ... tear out shower doors ..." on a similar endless repeat ala Rob and Fab.  {Note: I am still pretty devastated that Milli Vanilli fell from grace in such an embarrassing way.  I still love their music.  And I don't think I knew until maybe my mid-20s that their names were not actually Milli and Vanilli.  Sorry, random.}

Anyway, up today is my promised and much talked about DIY tutorial on how to remove shower doors.  I will start by saying I was completely prepared to call in a professional if the shower surround underneath was in dire shape.  I figured I could handle some minor patch work (especially since I got a new saw for my birthday!), but knew if the situation under those doors was grim, I'd need to call someone who knew what he or she was doing.  Lucky for me, that was not the case.

Remember, this is what I started with:


The first thing I did was take my time and evaluate my space.  My doors were screwed into a fibreglass shower surround on the two sides and glued/caulked to the porcelain tub on the bottom.  The big wrinkle was the one side of the tub near the window: the shower doors acted as a little barrier between that fibreglass surround and the wood wainscoting.  This part of the wall scared me.   I did my homework on Google, You Tube and eHow and searched how to remove shower doors and watched many a tutorial online.  I also asked several friends how they did it. This was all very encouraging. I made my list of supplies and got ready.


The supplies that I needed were: screwdriver, putty knife, utility knife, and needle-nosed pliers (to pull the anchors from the surround).  Of course, I also needed a shower curtain, shower curtain liner, curtain hooks and a shower curtain rod, not to mention some almond-colored caulk to match the shower surround for filling in the holes where the screws were.  Once I had all the goods, it was time to get to work.

First, I unscrewed the doors from the frame.  I took the screws out of the top and bottom rails.  This bottom rail part pretty much held the doors in place (and was also disgusting and literally crumbling).


Next, I gave a tug and pulled down those doors! Yes!  To my surprise, they were not heavy at all (I'd been warned it was possible that they would be super heavy), so I took them outside to the trash (note: we set the doors & rails out on the curb before trash day and someone came and picked them up! gotta love that they're not going to end up in a landfill).  Here I am dorkily celebrating my first success.


After the doors were out, I simply popped the top rail off, and I was left with just the frame.  So I then unscrewed the screws holding in place and gently used my utility knife along the caulked sides to loosen the frame from the wall.


Once I got the two sides down, all that was left was the bottom rail.  The side rail near the window ended up being just fine.  I might add a piece of trim to finish it off a little, but for now, it looks good.  Anyway, back to the tub -- I did not want to scratch or damage the beautiful porcelain tub, so I used a stiff putty knife on this.  And it worked, as I am making clear with my thumbs up.


Ok, see that black? That was glue and nastiness.  I used my bucket of cleaning supplies and cleaned that tub and made it shine.  I ended up using a combination of a Mr. Clean Magic Eraser for Bathroom, CLR bathroom cleaner, steel wool and Comet powder.


After a lot of scrubbing, rinsing and scrubbing some more, I had done it!  My tub was completely clean and bright.  Once I finished cleaning, I simply caulked the small holes where the screws had been and called it a day.


Hooray!  Removing the doors and then cleaning/patching the tub and shower surround took a little under two hours.  Not bad!

Do you have any demo-type projects on the horizon? Share! We love that stuff.

See you swoon,

Rice Grain It Is

The last three days have been completely exhausting...and painful but as I sit here and gaze at all of the hard work that has been accomplished I honestly feel like it was all worth it and I would do it all again in a heartbeat.  I was going to wait to show you the before and after shots of the paint job that Shanna, Kelly and I took on so that I could show you the room before (you all have seen this madness but I will show you again in a minute), finish the room completely, and then reveal the after, but where is the fun in that?  So the plan now is to show you all the changes along the way, after all, most of the fun is in the journey isn't it?!

Some of you may have seen Shanna's comment after leaving here Sunday, the Rice Paddy that we were so excited about, well, it went back to the store, FAST (thank you Lowe's).  On the fan deck Rice Paddy and Rice Grain looked beautiful together, it was the perfect green for me.  Then I get the gallon home and BAM, on the wall is neon yellowish green, not what we had in mind.  This was very disappointing and for the sake of having clean painted walls for the holidays we decided on Rice Grain throughout.  This color is classic and leaves a lot of room to have fun with colorful accessories which you will see in later posts.

So here we go, McDonlad's colors are gone, here you see the before of the dining room and front room:


A little hard to see with the sun beaming in but we did end up counting four colors in this room alone including the ceiling and crown molding.  What you cannot see here is the wall with the scones that I featured before was dark green like the ceiling in our bedroom but not anymore!


And After: Notice the new dining room set from Craigslist, more before and afters on that coming soon!


And for the full Christmas Tree effect:


Send us your transformations, I would love to see the color combinations you have chosen.  And if any of you have found a green that meshes well with Rice Grain let me know.


See you swoon,