Tutorial: Hanging a Bathroom Cabinet

You all have seen the before and after of my lovely bathroom cabinet and today I will explain how I hung that bad boy minus all the drama!

We went from this:


To this:


And this my friends is how I did it:


Step 1~Finding the right hinges.  I had to decide if I was hanging this on the outside of the frame or cutting it down to fit inside.  It was easier for me to hang the door on the outside.  Lucky for me, my kitchen cabinets are hung the same way so I examined them a bit and knew exactly what I would need for the bathroom cabinet.  The hinge I bought is called a wrap around or partial wrap hinge.

Step 2~ I held the door up just to get a visual of how it fit around the frame, this also helped me to get an idea of where to place the hinges.

Step 3~ This is where I would advise you to get a partner but from personal experience, this can be done alone.

Step4~Make pencil marks on the cabinet door and the door frame  to show where you need to make your pilot holes for the screws.  You will want to make pilot holes for the screws first to avoid any wood splitting and to make life much easier when screwing the actuals screws into the wood.

Step5~Screw the hinge into the cabinet door.

Step 6~ Hold the door with the hinges screwed in up to the frame and make pencil marks on the frame for your second set of pilot holes.  For me I had to add an extra step that included a shim. See here:


Without this my door left ugly gaps so the hinges needed to sit inside the frame just a little further so the door covered all the spaces.

Step 7~This is when I screwed pilot holes into the shim and therough the frame so the screw would catch both pieces of wood for extra strength.

Step 8~Have someone hold the door up while you screw the cabinet door to the frame.

Step 9~Add any hardware you may have and there you have it.  A brand new cabinet door for you to enjoy and that will stand the test of time.

What projects are going on in your home?  Do you have any planned for this weekend?  If you do take some pictures and send them our way so we can share them with everyone!

See you swoon,

Swoon-Worthy: Colleen & Craig's Wedding {part 1}

If anyone is starting to feel the Winter doldrums, this wedding will give a much-needed dose of pretty.  Colleen is a dear friend of mine from law school. We were roommates for one year, coworkers (at two different Firms!) for a total of eight years and have been friends for nearly 13 years.  So when she got engaged and asked if I would help her with her wedding program for her upcoming nuptials, I was all over it.


One thing led to another, and not only did I make the program, but Jamie and I ended up creating tons of custom details for the wedding and coordinating it to boot!  Up this week are the beautiful pictures from Colleen and Craig's wedding, which were taken by the amazingly talented Eric Mencher Photography.  I'll separate into two posts: today are the wedding pictures and Friday will be the details.  Without further ado, here are the gorgeous pictures from a gorgeous and happy wedding day! Enjoy!


Colleen and Craig were married in late September, and rather than go with a kind of expected Fall color palette of rusts, golds, browns or crimsons, Colleen wanted something softer and more feminine.  I adored her color choices of that bright springy green for her maids and gorgeous, lush flowers in all white and sages.  They were married under a clear-topped tent in the Morris House Hotel's courtyard, and all of the colors popped beautifully.


(don't you just love this picture above? it's one of my favorites.  I love that moment of anticipation waiting for the bride to walk down the aisle)


I'll say it again: the flowers were to die for.  So simple and yet so stunning ... and after the ceremony, the guests tossed dried rose petals and shamrocks at the happy couple.


After the ceremony, they took a bunch of really cool shots in and around the hotel.  I'm a sucker for city weddings because I love how the architecture just pops behind a happy bride and groom.


Finally, here are a few of my favorite shots from their reception.  I *love* the one where Craig is looking at Colleen ... what bride wouldn't love to feel that way?


There you have it!  Doesn't it make you want Spring right this instant?  Details aside, the best part of the wedding was how happy Colleen and Craig were the entire day.  Love it.   Got any favorite shots above? What do you think about her color palette? I'd love to hear - let's talk wedding today!


See you swoon,


Colleen's wedding professionals:

* Photography (and all photos above courtesy of): Eric & Kass Mencher, Eric Mencher Photography (we featured Eric Mencher photography here)

* Venue: The Morris House Hotel, (we featured Morris House here) Philadelphia Pennsylvania

* Make-Up: the amazingly talented and lovely Beke Beau

* Flowers: Nature's Gift Florist, Voorhees New Jersey

* Photo-booth: Shutter Booth Philadelphia (we featured Shutter Booth here)


Before & After: Bathroom Cabinet

I feel like a proud parent showing you my stunning bathroom cabinet door, painted, hung and functional!  I must admit, hanging a cabinet door on your own is no small task (I thought it was) so there was a lot of swearing and sweating, not to mention some of the strangest positions I have ever stood in to try and hold the cabinet door and drill at the same time!  I am not going to do this again while I am alone just for own sanity but at least now I can say my work was completely worth it, wait until you see these.


This is how we started {Habitat for Humanity cabinet door $4.00}:


Thanks to my power sander that I received for Christmas I was able to sand this guy down in no time.  It had a shiny finish so sanding was necessary for the paint to stick, make sure you really rough it up, don't be scared.


This is my sander, it actually doubles as a saw.  I think it does a few other things but so far these are the only two features I have used.  I would absolutely recommend this one, it is compact and cordless.


OK, so here we go. Coat number one with my Benjamin Moore high gloss paint {a full can from Habitat for Humanity for $5.00}:


I am not going to take you through each coat but it took three coats to get every inch covered completely.  I made sure each layer was as thin as possible to avoid any drips.  So this is what it looks like completely painted, well the backside anyway, you will see the rest in a minute:


Next up, getting this guy hung, sigh. I knew the door fit around the opening of the cabinet but it needed a few adjustments so it hung correctly and so any dark gaps were hidden.  You will also notice that originally this frame had a ridge around it.  I did like the ridge but the door was just large enough to fit around the edges so you would see the ridge stick out in some areas and then not in others.  I guess this would be OK for some but I know it would make me insane so the ridge had to go.  I filled it with spackle, this required spackling and sanding twice to make sure all edges were filled and no longer visible. 

SOOOOOOOO, here is the before cabinet:


And without the ridge:


At last, for the moment you have all been waiting for, que trumpets.....


And finally, the hardware and the mirror my husband loves:


Did you have any home projects that you took on this weekend?  Any upcoming projects you want to share?  We want to hear about your trials and triumphs!


See you swoon,

January Challenge {week 3}: battle of the (rubber) bands

Week three into my January organizing/decluttering challenge, and I am going strong!  Up today: my daughter's hair bands, bows and barrettes.  As soon as she had enough hair for barrettes or bows, I was all about putting them in her hair.  Now that she is 2, her hair is long and her stash of ponytail holders, barrettes and clips is astonishing.  I think they are like rabbits and multiply, because the drawer where I keep her hair accessories is a mess.  I decided it was high time to tidy it up. Here is the drawer before.


As you can see, it is a mix of hair accessories and medicine-type things like baby Tylenol, nail clippers and her epi-pen.  Since both kids can access this drawer, I decided to move all the meds to a different, higher location, just for peace of mind.  Once I was down to just the hair accessories, I sorted them into three piles: rubber bands, barrettes and clips. I already had the drawer organizers in the drawer: I bought them a few years ago in the kitchen organization section at Target (I think they're supposed to hold utensils).


Once I sorted, I realized she had a bunch of different sized rubber bands, so I took my organizational efforts one step further and divided up her rubber bands within that big bin.  I save all of the Tiffany boxes when I get jewelry from Tiffany's (please: who can bear to part with these lovelies?), so I was able to reuse the gorgeous robin's egg blue in her drawer for a pop of pretty that I will appreciate, and that may hopefully subconsciously begin her own affinity for overpriced (but certainly worth every penny) jewelry.  I even had room for her nail clippers, Triple Paste and Aquaphor on the sides.  Here's the drawer now:


Love it! Now when Little demands a clippie, I know just where to find it.  And the best part: this organizing project took all of 10 minutes and didn't cost me a penny.  Gotta love a quick, easy fix.  If you need help organizing anything big or small, let us know. We're up for the task!

See you swoon,

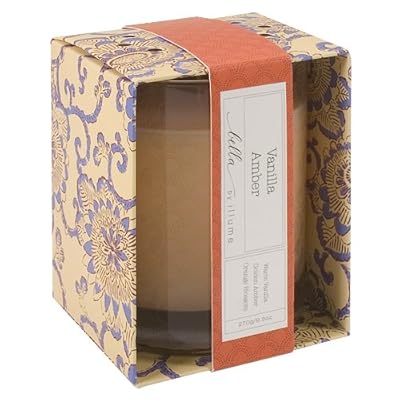
Swoon-Worthy Find: Vanilla Amber, yummmmmm

I know today was supposed to be a before and after on my new beautiful cabinet door for the bathroom, however, that did not work out as planned last night.  Apparently, there are millions (yes I am exaggerating a bit) of hinges to choose from when it comes to hanging a door and I did not have the hinge that would hang the door on the outside of the frame so more on this next week.

Today we are doing a feature of the week.  I chose this candle because I just bought it at Target last week and it smells amazing!  It actually reminds me a little bit of Shanna's scent (I am not sure what perfume she wears but it smells awesome!).


Product Image


For all of your running to Target for a few essentials this weekend and just know that you will walk out with an arsenal of things you had not expected to buy (you know this is what happens, it is almost like they spray some sort of gas when you walk in to make you forget why you are there in the first place), pick this candle up and take a whiff.

What are some of your favorite scents.  My husband and I have an addiction to all air fresheners and candles, mostly him, but let us know what you use and we would love to check it out!

See you swoon,